Getting Started with Ethernet & OSC Protocol
This page is for pipe organ builders who want the most direct method available to get an iPad connected to an Opus-Two controller.
If we sent you an Eero (bright white) access point:
The Eero units should always be powered (not turn on/off with the organ). If there is one Eero, it needs to have one ethernet receptacle connected to the internet and the other connected to the Opus-Two controller.
If we sent you a TP-Link or ASUS access point (black):
Internet access is not necessary (but can be connected). The Opus-Two controller should be connected to one of the ethernet ports on the access point. The startup time of the access point is several minutes, so it is suggested that it be always on.
The access point default SSID will be “opticsneural” and the default password will be “thanksFred.” We suggest you not change these. The controller’s IP address is defined in its config file, but is typically set to .12 on the local subnet. Most ASUS and TP-Link access points use 192.168.175.1, which would make the controller’s address 192.168.175.12.
On your iPad and computer:
With a working internet connection, download “TouchOSC MK1” from the appropriate app store to your device. Do not confuse this with “TouchOSC” which is not yet compatible with our layouts.
With a working internet connection, download TouchOSC Editor for Mac or Windows to your laptop.
Download the latest TouchOSC layout from us.
Use the TouchOSC Editor to upload the TouchOSC layout to the iPad (on the tablet, from the list of layouts, click “Add…” and on the computer with the layout open, click “Sync”. The process should be self-explanatory, if not, consult us for step by step instructions. Hint: both the computer and tablet must be on the same WiFi network.
In the TouchOSC configuration screen on your mobile device, open the OSC menu and make the following changes:
Tick the “Enabled” slider to “on”.
Change the Host IP address of the “OSC:” connection to your controller’s IP address (should be 192.168.175.12 if you haven’t changed it).
Make sure the outgoing port is 8000 and the incoming port is 9000 (this should be the default settings).
Press “Done” and in the layout press “Subscribe” - the layout should change from the grey view to the colored views below:
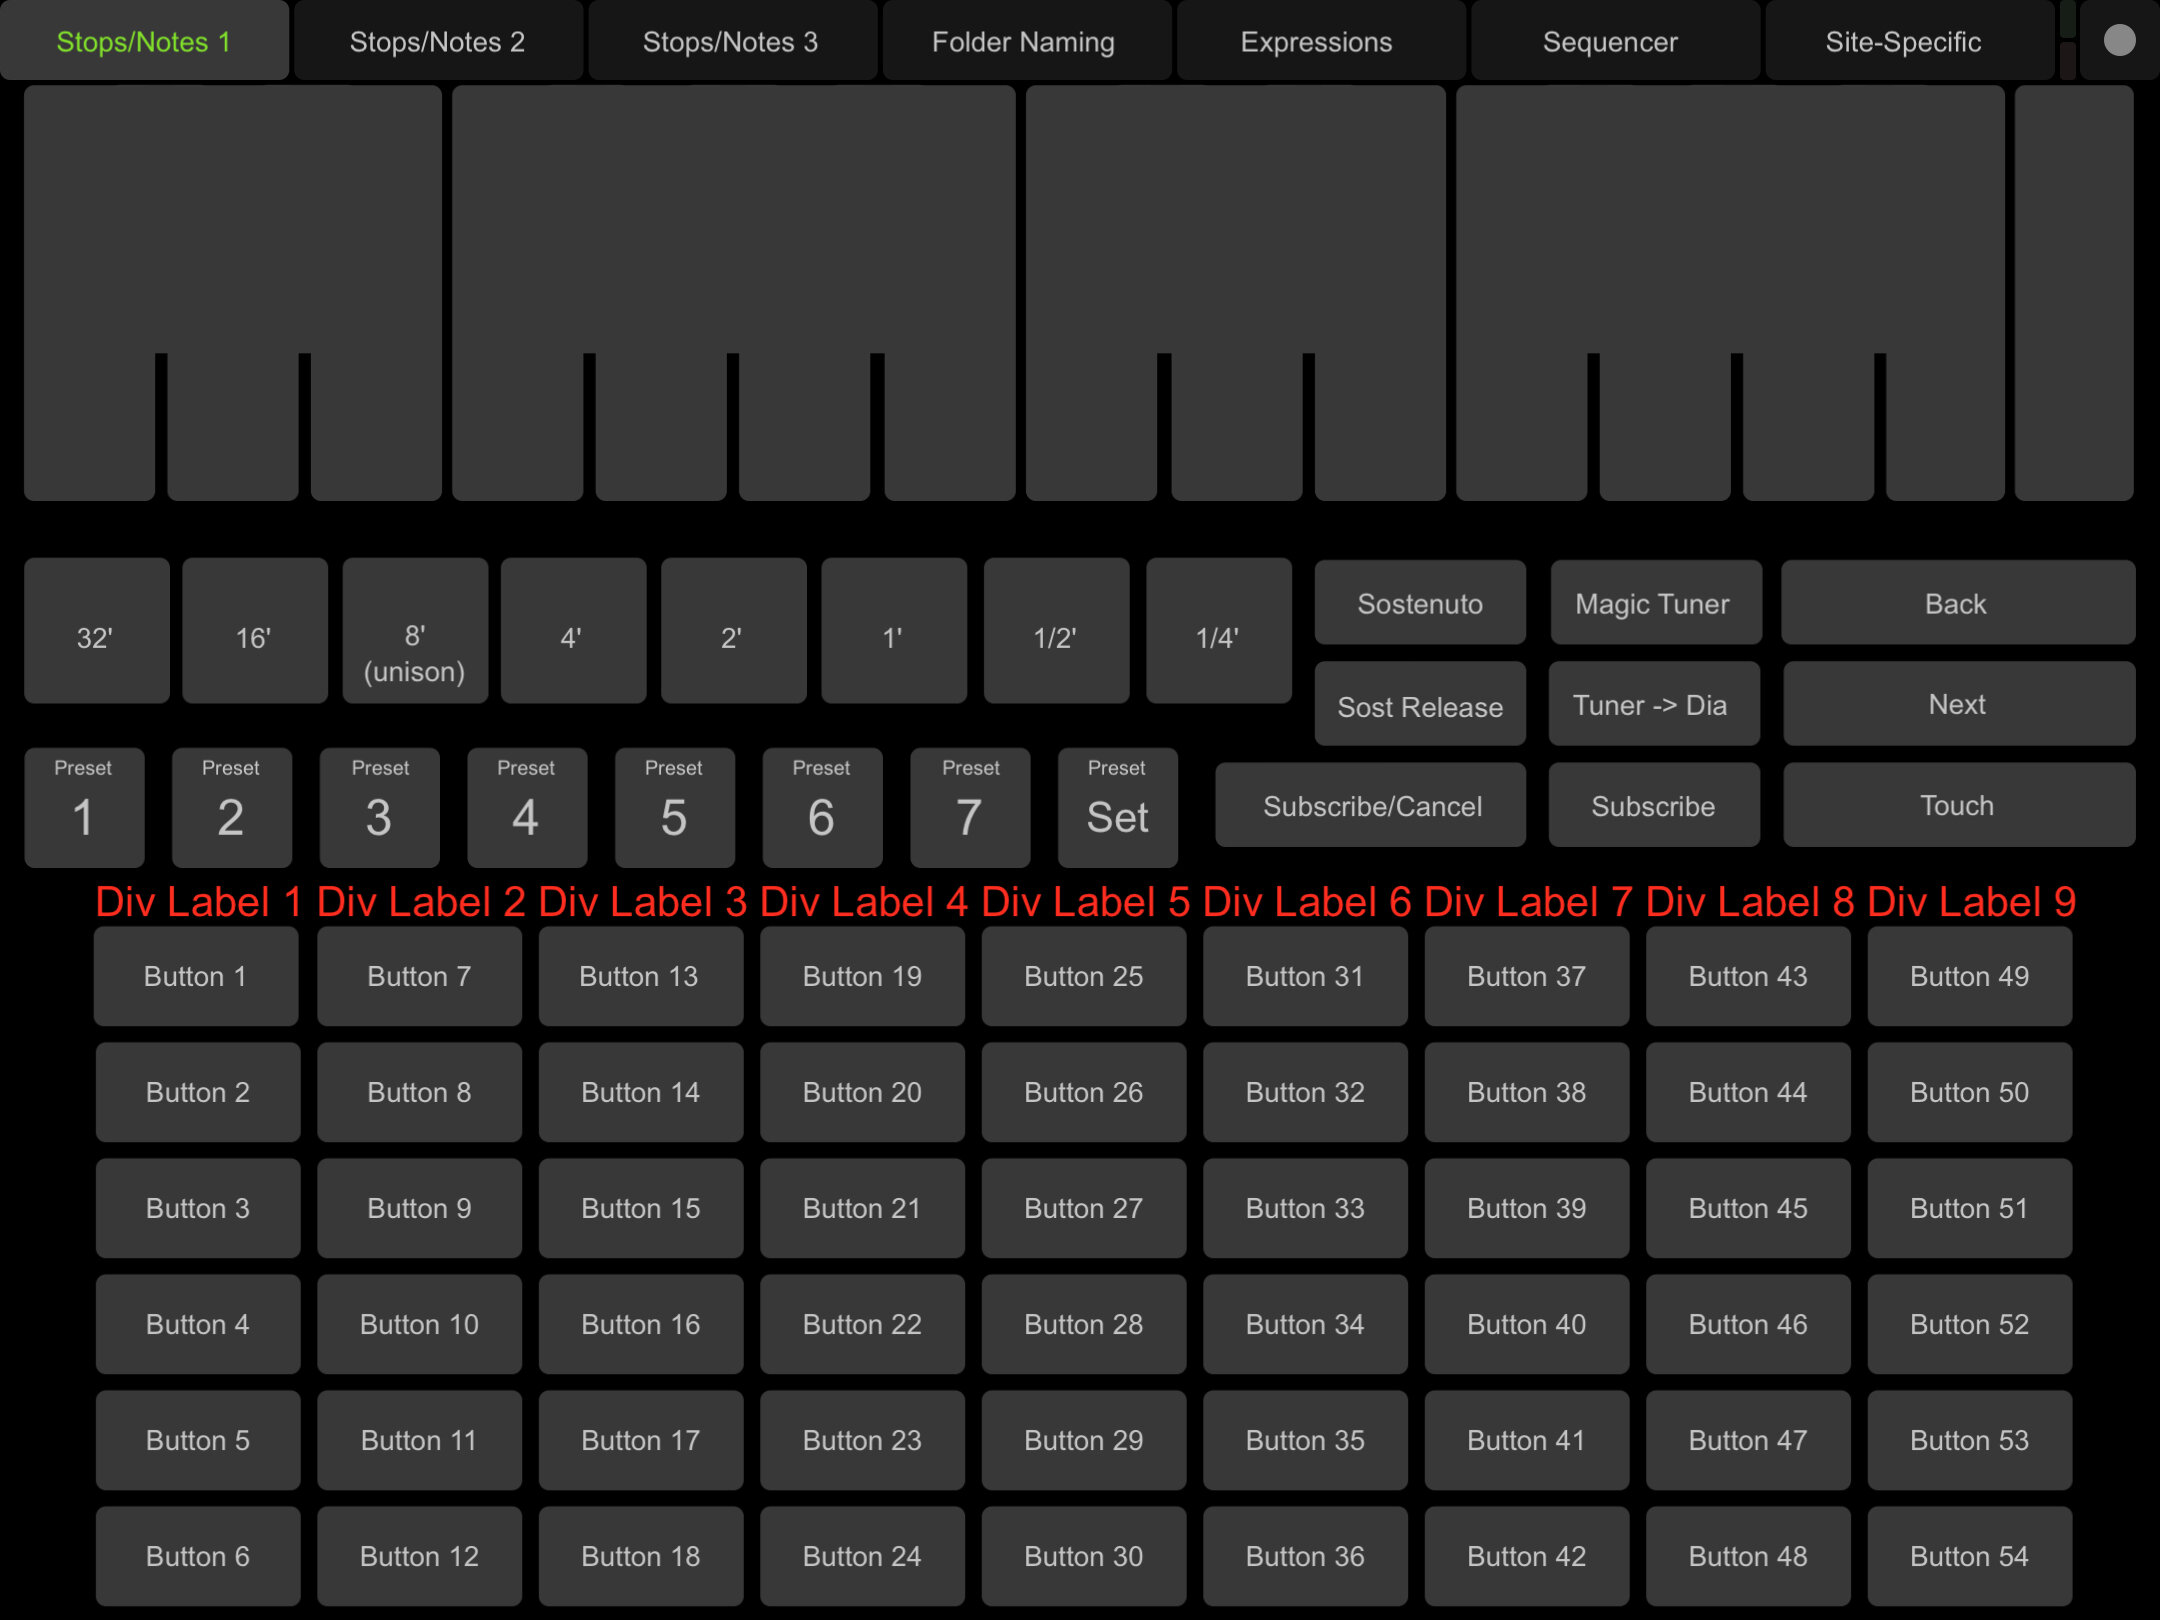

Note that many aspects of the UI are actually inhereted from the Opus-Two controller upon subscription. The tab names at the top, division tag labels, each button name, etc. Also note the “Presets” - these are completely independent of the console combination action and are just for connected TouchOSC layouts.
This layout will universally work with any Opus-Two Ethernet-enabled controller. Simply arrive on site with the iPad, connect to the WiFi, and subscribe. One of the reasons we suggest you not change the SSID and password is that your iPad will recognize the “known network” at another site and automatically connect, which is just one less step a tuner/technician has to deal with.
Want to modify the layout for your own needs or create your own? The protocol is here.
Note: Newer TP Link (wifi 6) admin passwords are “Tp-link”